Neuron Editor Overview
Core Functionality
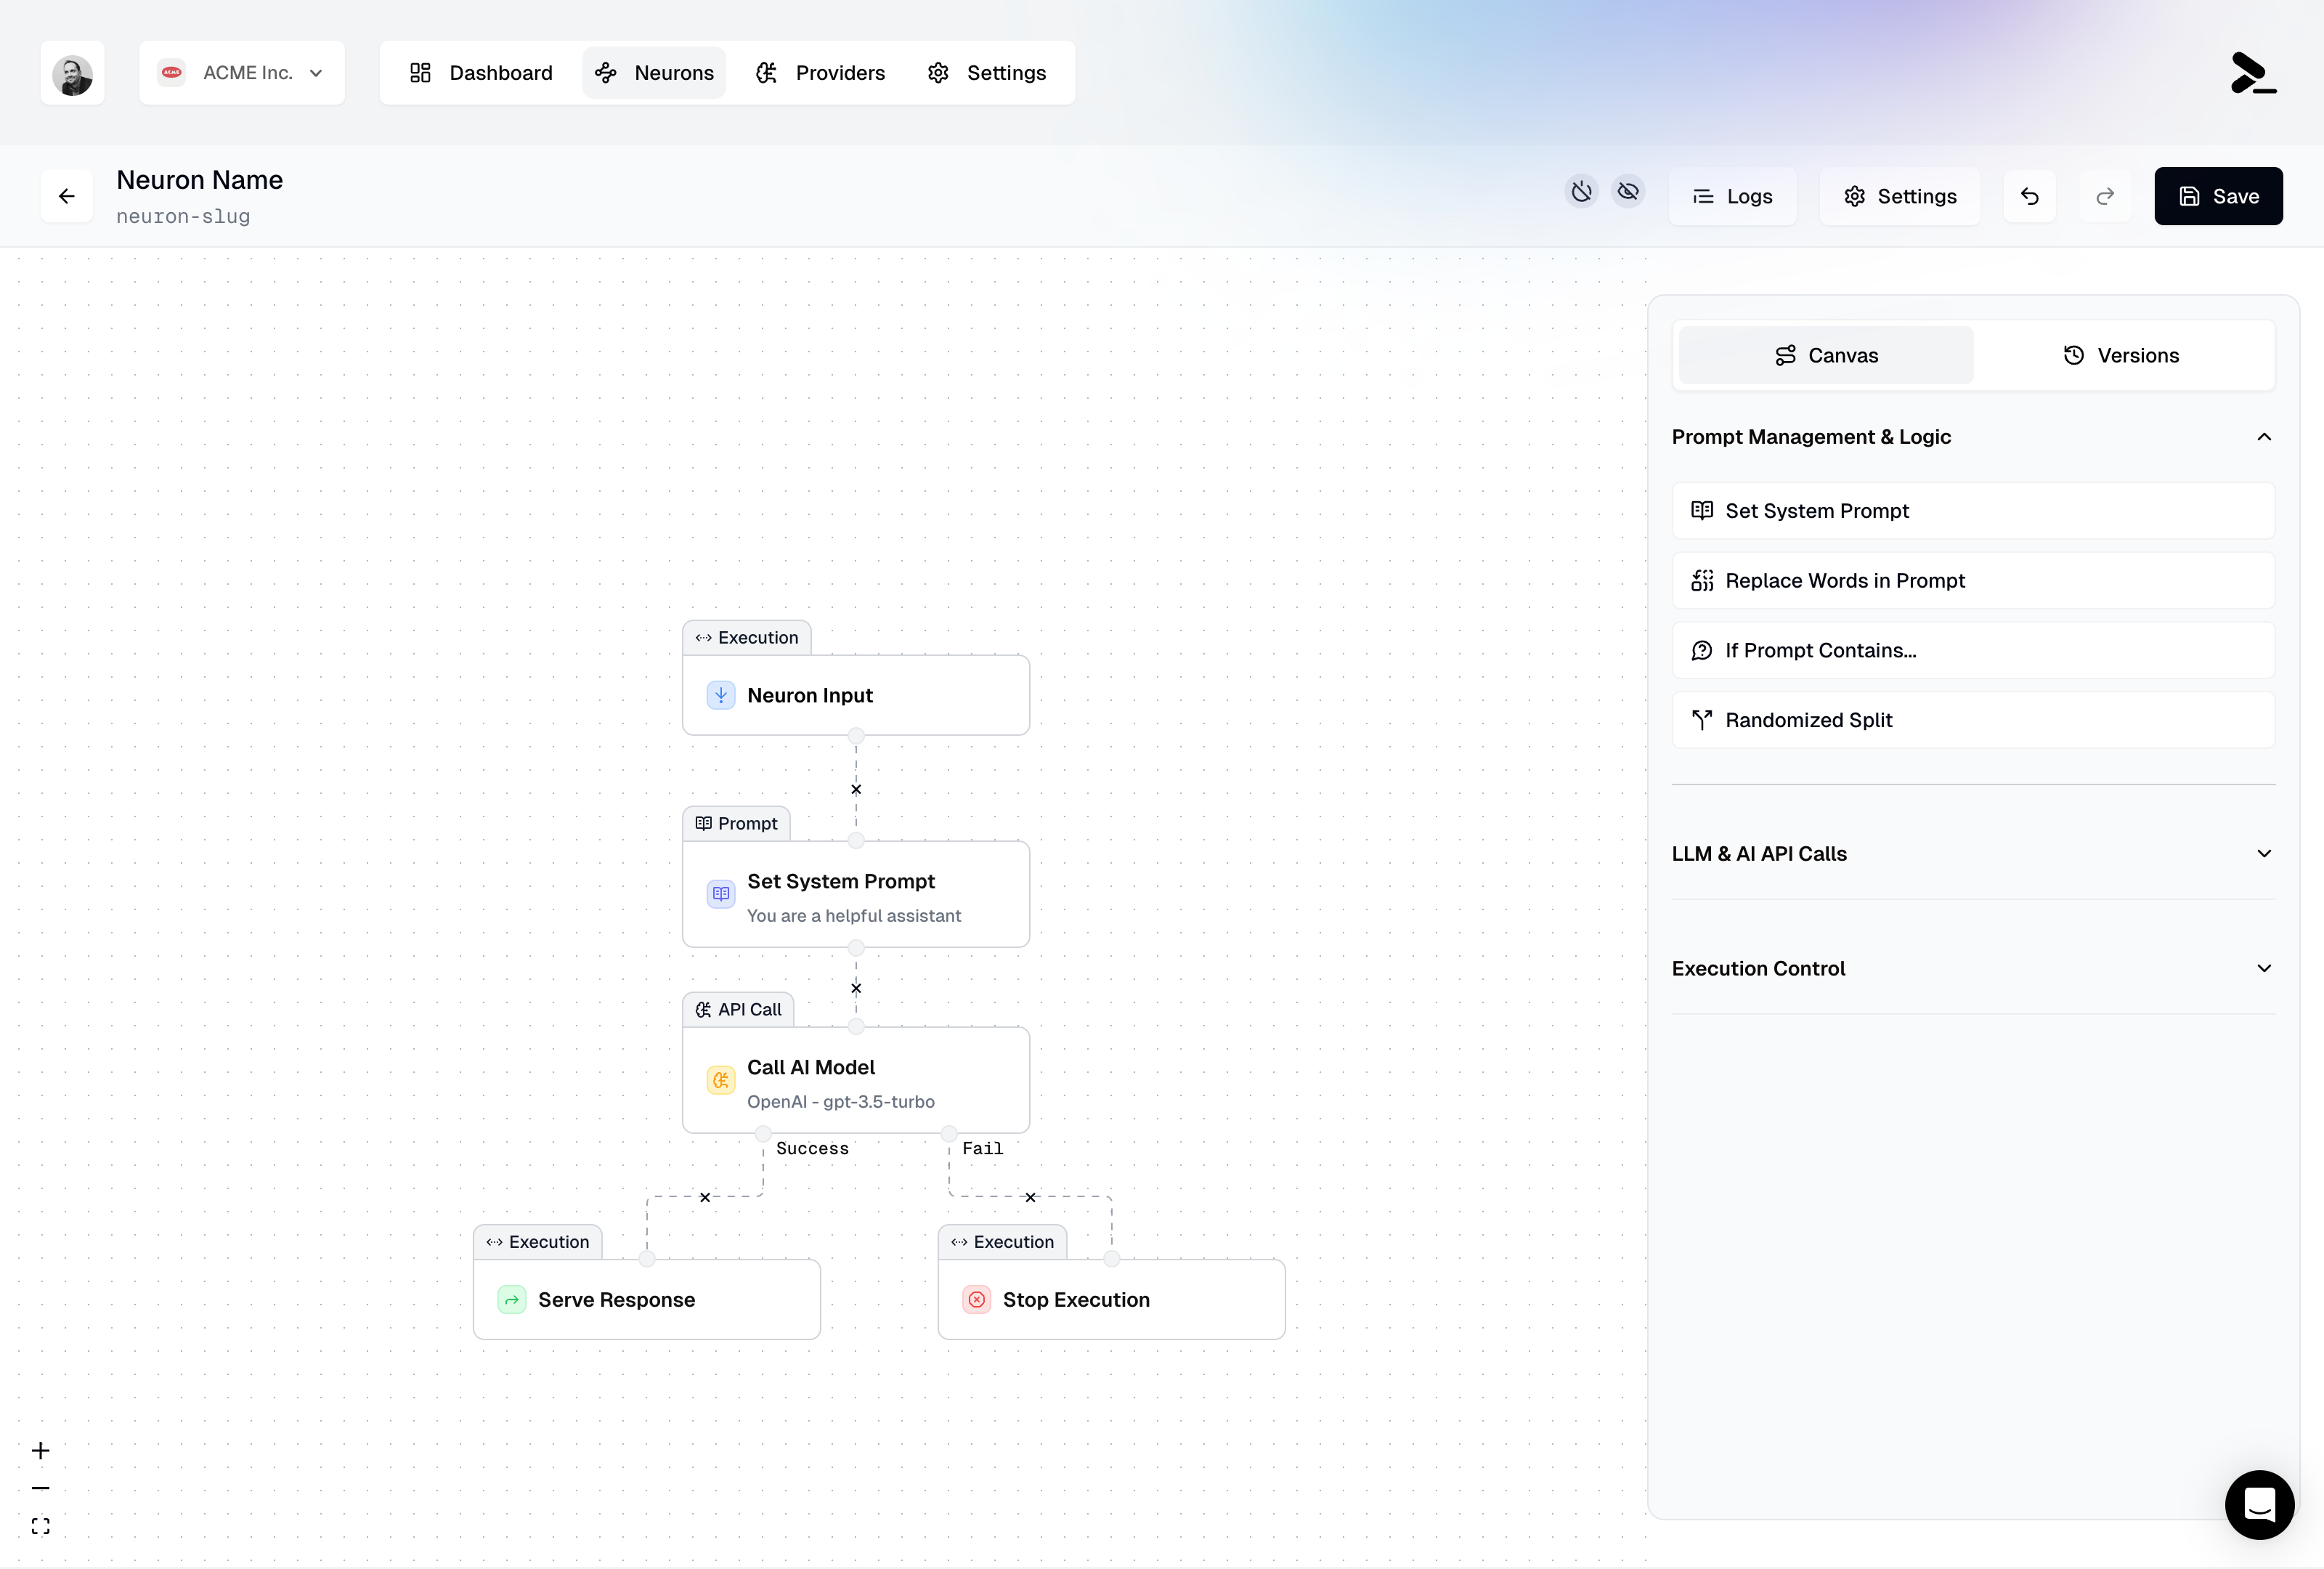
The Neuron Editor features a user-friendly drag-and-drop interface that makes building AI workflows straightforward and efficient. With this interface, you can create and connect nodes to define your workflow steps, customize individual node settings, and manage your Neuron’s properties. The editor makes it easy to save your work, duplicate existing Neurons, and delete them when they’re no longer needed.Available Node Types
The Neuron Editor comes with a comprehensive set of node types to help you build sophisticated AI workflows. Here’s what’s available:Prompt Management & Logic
| Node | Description |
|---|---|
| Set System Instructions | Define system-level instructions for AI interactions |
| Replace Words in Input | Dynamically modify input before sending to AI models |
| If Input Contains | Create conditional branches based on input content |
| Randomized Split | Add variety with random branching paths |
LLM & AI API Calls
| Node | Description |
|---|---|
| Call AI Model | Connect to and interact with AI models |
| Call Neuron | Call another Neuron from within a workflow |
| Replace Words in Output | Transform AI model outputs as needed |
| If Output Contains | Branch workflows based on AI output content |
Control Flow
| Node | Description |
|---|---|
| Use Output | Access and incorporate outputs from previous nodes |
| Stop Execution | End the Neuron execution when needed |
| Serve Output | Return the final output to your application |
Interface Comxponents
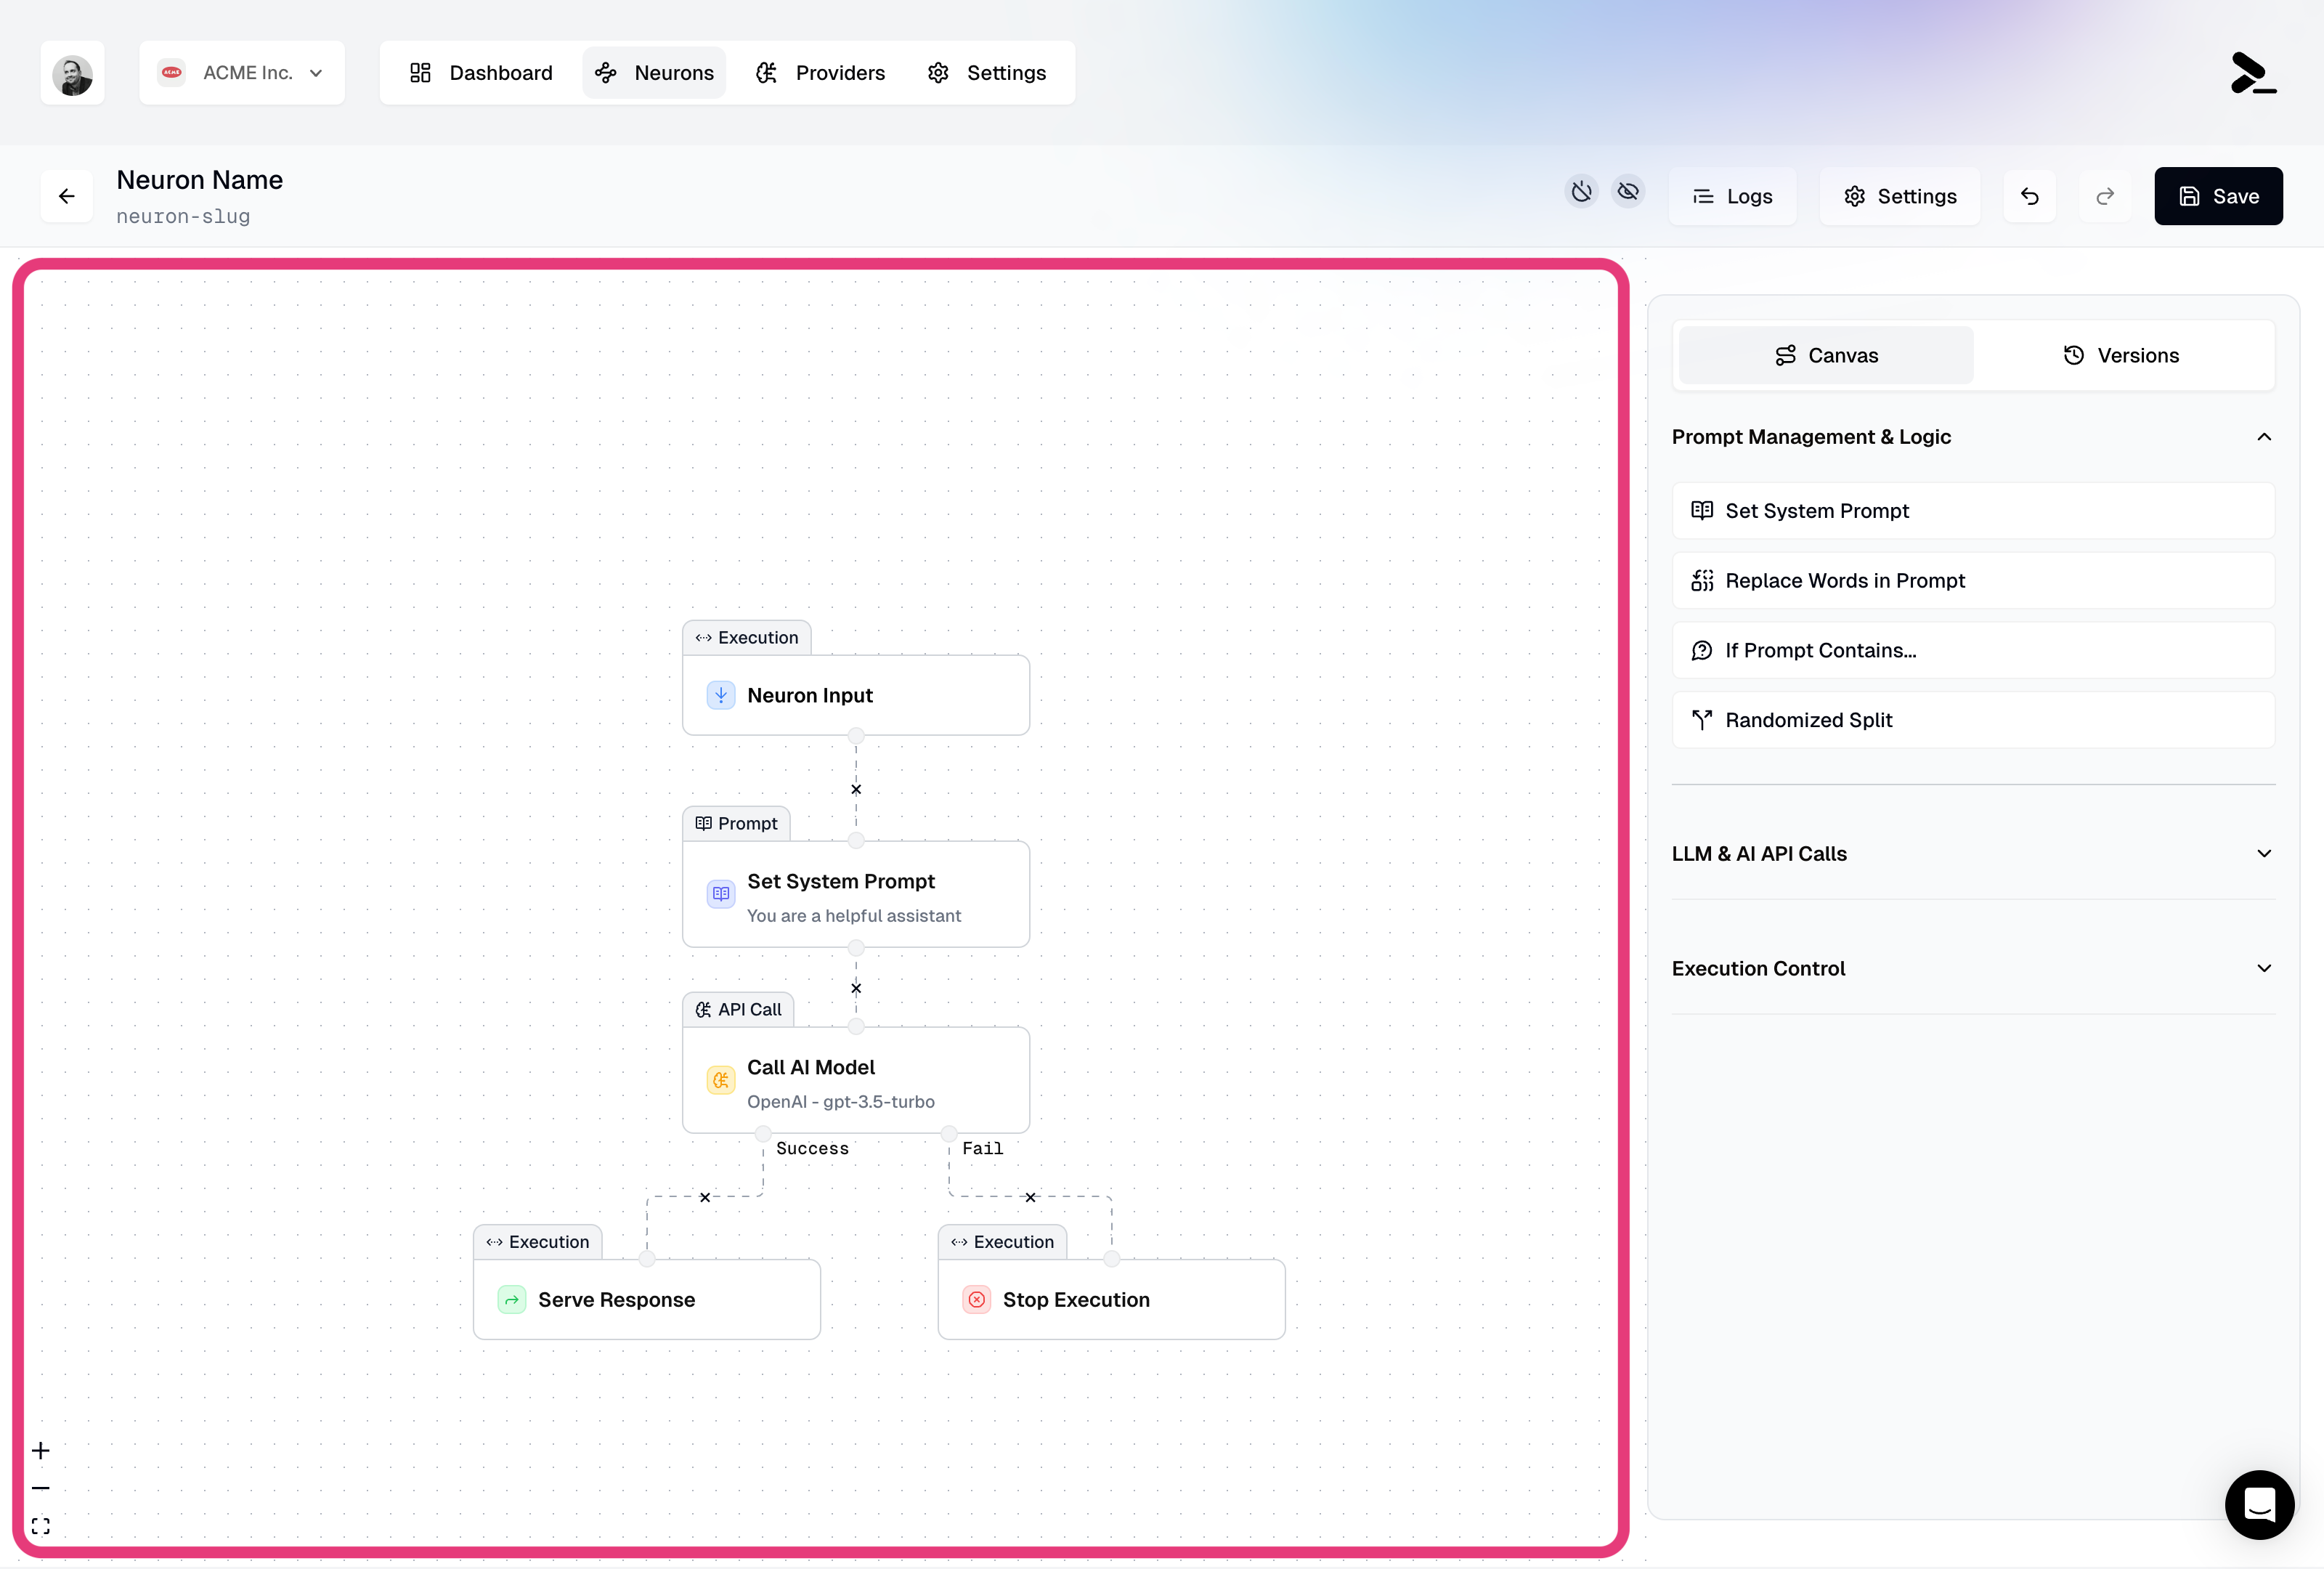
The Neuron Editor’s interface is designed for efficiency and ease of use, with three main sections that work together to help you build and manage your workflows.Canvas (Workflow Editor)
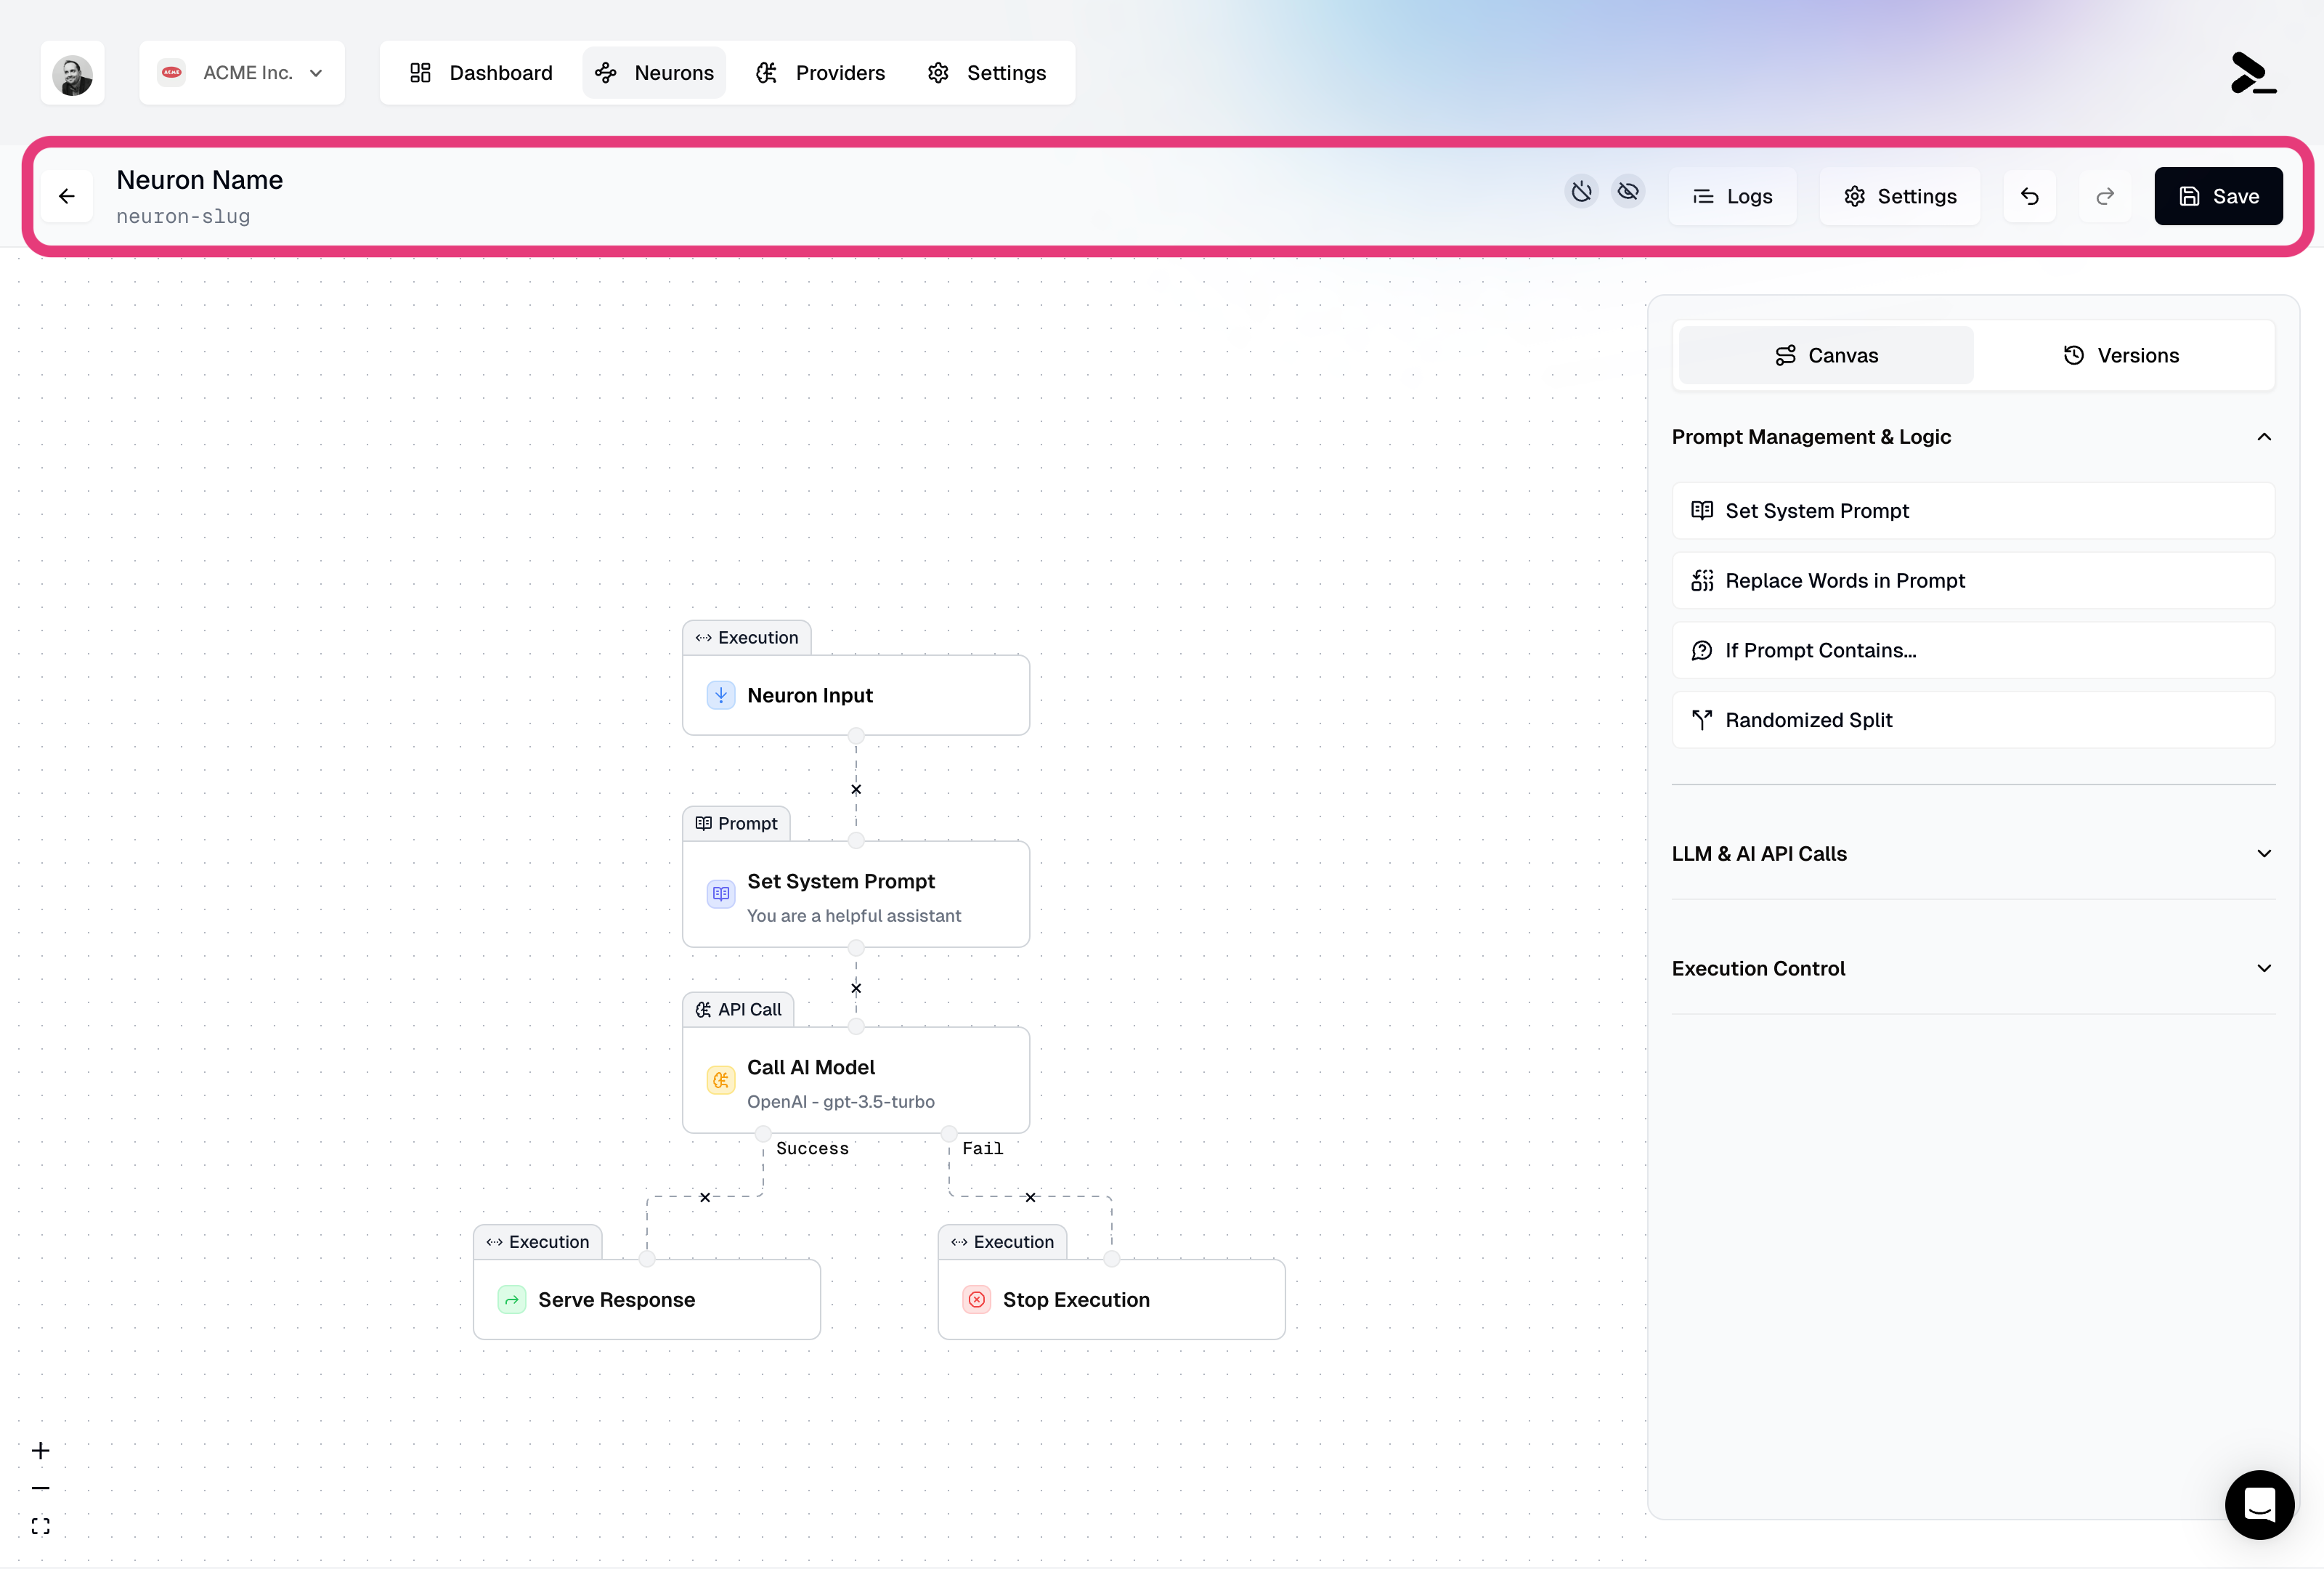
Navigation Bar
Inspector/Addition Panel (Right Sidebar)

Working with Nodes
The Neuron Editor makes it easy to work with nodes through a variety of intuitive operations. You can add nodes by simply dragging them from the right sidebar to your canvas, and connect them by linking their output and input connectors. Each node can be configured through the right sidebar, where you’ll find all the relevant settings and options for that specific node type. Managing your nodes is straightforward: use the icon (or Delete key on your keyboard) to remove nodes, the Cloning icon to quickly copy nodes, and drag to reposition them on the canvas.Best Practices
Building effective Neurons requires a combination of planning, organization, and regular testing. Start by outlining your workflow before building, ensuring your design is clear and efficient. As you work, keep your workflow organized with a clean layout that makes the flow easy to follow. Make sure to save your work frequently and test your Neuron regularly to catch any issues early. Take time to review the documentation for each node type to fully understand their capabilities.Next Steps
Ready to make your Neuron available? Here’s what to do next:- Configure your Neuron’s settings to control access and behavior
- Deploy your Neuron to make it available via API
- Call your Neuron from your applications